WordPress has a native way of sending emails. It uses the PHP mail() function to deliver all those newsletters, password resets, or any other type of email you’re sending to your audience. While this method should theoretically be sufficient, it’s far from perfect.
In WordPress, sending emails with SMTP is a much better alternative. And it’s not difficult to set up. Today’s tutorial will show you how to do that with and without plugins.
Table of Contents
What is SMTP?
SMTP or Simple Mail Transfer Protocol defines the rules for email transmission. It makes it possible to exchange emails among different types of computers, servers, and networks.
An SMTP server is an app that functions according to the SMTP protocol and sends emails from the sender to the recipient. To simplify this process, the SMTP server receives emails from the email client (Gmail, Yahoo!, Outlook, etc.) and transfers them to other SMTP servers if needed. Then emails get picked up by recipients’ SMTP server and delivered using incoming mail servers (POP3 or IMAP).
Why is it a good idea to use SMTP for sending emails in WordPress?
As we mentioned in the beginning, WordPress uses the PHP mail() function to send emails. This method is problematic for multiple reasons:
- It is mostly suitable for simple, plain text emails. HTML capabilities are quite limited, and you can’t add attachments or embed images. That leaves you with boring emails and little to no design elements;
- It has significant deliverability issues. PHP mail() doesn’t have proper email headers. As a result, internet service providers (ISPs) mark emails sent with this method as spam or reject them altogether. So, if you, for example, automatically email new posts to your subscribers using PHP mail(), the chances are you frequent spam folders;
- It doesn’t allow for sending emails through external servers. Even if you configure SMTP settings, it will only be usable with localhost or a similar solution. PHP mail() doesn’t support SMTP authentication either.
The easiest solution is to configure WordPress to send emails with an SMTP server. The latter requires header authentication and supports secure transmission through SSL and TLS. This means that you’ll have lower chances of encountering email deliverability issues, particularly if you use a reliable SMTP service and set everything up properly.
On that note, let’s figure out how to send emails in WordPress with an SMTP server.
Configuring SMTP in WordPress without Plugins
You can configure SMTP in WordPress without plugins with a bit of coding and PHPMailer. It’s a library created for PHP to overcome the shortcomings of the mail() function. PHPMailer supports complex email bodies (including HTML and embedded images) and attachments. Most of all, it enables you to send emails with any SMTP server.
For PHPMailer to work, we need a working SMTP server. In the code sample below, we’ll use Gmail SMTP to send emails in WordPress. But before we get started, you should create an app password with these instructions. Otherwise, you won’t be able to authenticate successfully.
Now, navigate to your website‘s root directory and locate wp-config.php file. Use the following code sample to configure WordPress SMTP settings using Gmail credentials.
define( 'SMTP_username', 'your-email@gmail.com' );
define( 'SMTP_password', 'your-gmail-app-password' );
define( 'SMTP_server', 'smtp.gmail.com' );
define( 'SMTP_FROM', 'your-sender-email@gmail.com' );
define( 'SMTP_NAME', 'Your Name' );
define( 'SMTP_PORT', '587' );
define( 'SMTP_SECURE', 'tls' );
define( 'SMTP_AUTH', true );
define( 'SMTP_DEBUG', 0 );
Go to the theme editor and find functions.php file for further edits. Note that it’s recommended to make changes to the child theme to avoid the malfunctions of the main theme. Add the following script to the functions.php file.
add_action( 'phpmailer_init', 'my_phpmailer_smtp' );
function my_phpmailer_smtp( $phpmailer ) {
$phpmailer->isSMTP();
$phpmailer->Host = SMTP_server;
$phpmailer->SMTPAuth = SMTP_AUTH;
$phpmailer->Port = SMTP_PORT;
$phpmailer->Username = SMTP_username;
$phpmailer->Password = SMTP_password;
$phpmailer->SMTPSecure = SMTP_SECURE;
$phpmailer->From = SMTP_FROM;
$phpmailer->FromName = SMTP_NAME;
} Save the settings and that's it. Now your WordPress sends emails via SMTP server.
For more details, see how to send emails in WordPress via PHP function.
Using plugins to set up WordPress SMTP
A simpler way to configure WordPress to send emails via SMTP is through dedicated plugins. They don’t require coding skills – you’ll be able to configure them even without developers’ help.
WP Mail SMTP

WP Mail SMTP is the most popular plugin for setting up SMTP. It instructs PHP mail() to use one of the integrated mailers or custom SMTP settings. By doing so, it solves the deliverability issues of the native function.
You can easily install WP Mail SMTP by navigating to the ‘Plugins’ tab from the dashboard of your WordPress website and pressing ‘Add New’. Type in ‘WP Mail SMTP’ in the search box, press ‘Install Now’, and then ‘Activate’.
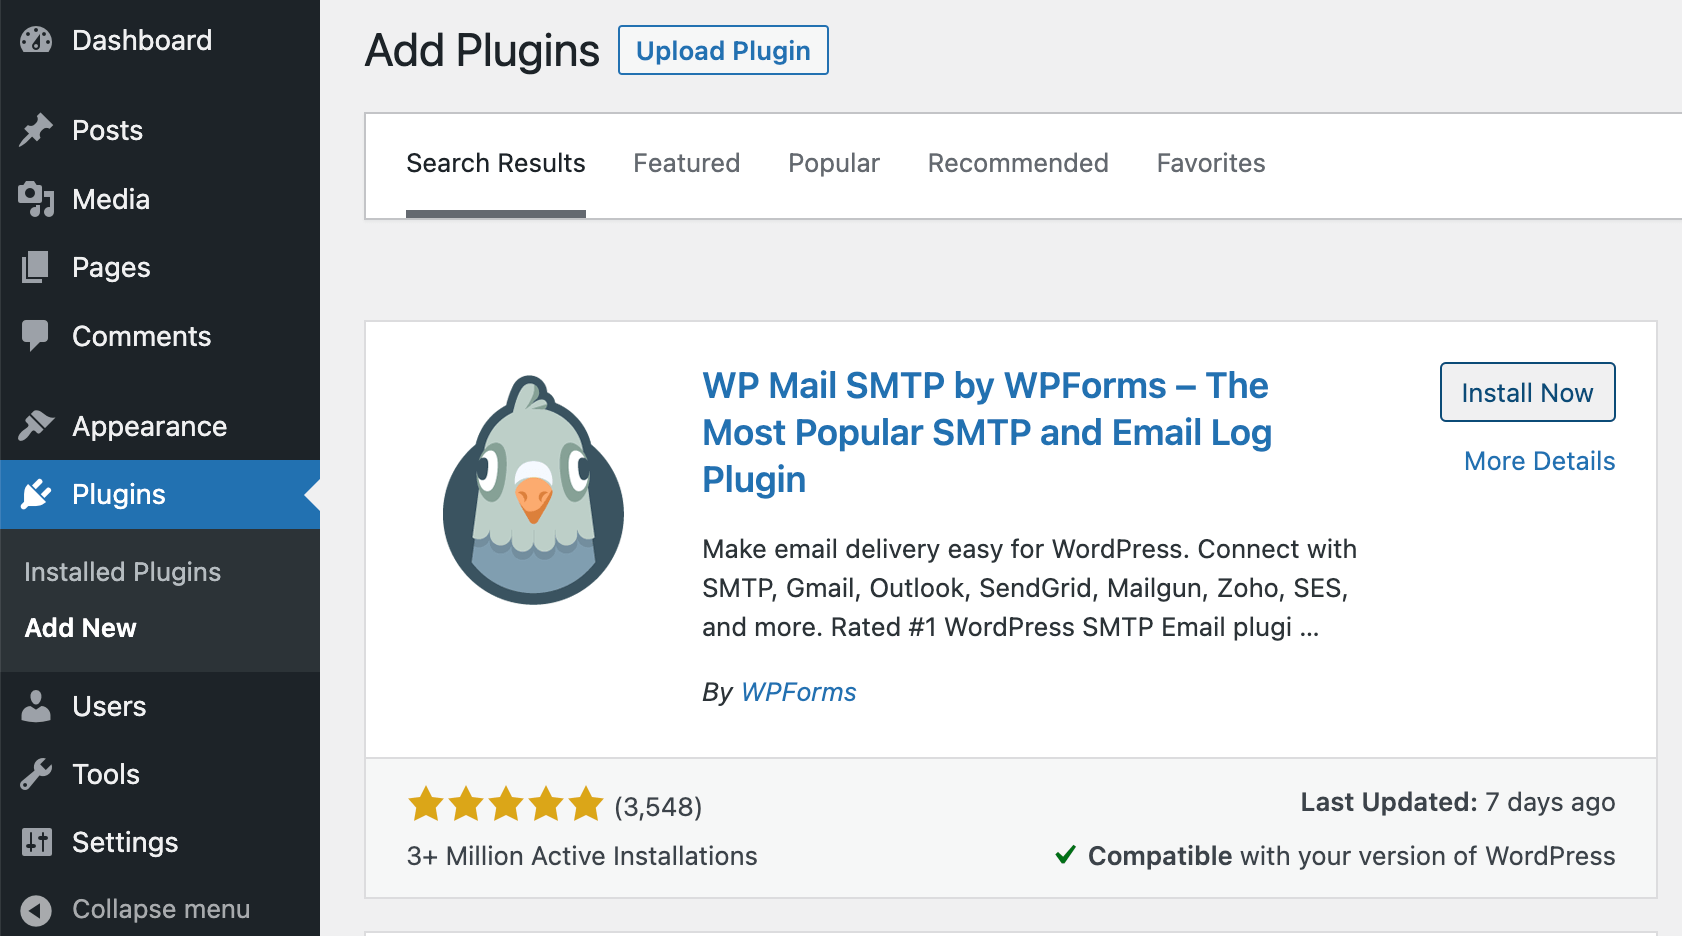
Once the plugin is installed, you can configure the mailer from the dashboard or by using the setup wizard. Both have the same concept, just different designs. We prefer using the dashboard so we’ll be setting up the plugin with its help.
We have two main options:
- Set up WP Mail SMTP with third-party SMTP services
- Use a built-in mailer
The first step is the same for both options so let’s discuss it here. Open WP Mail SMTP settings and scroll down to the From Email and From Name under the ‘Primary Connection’ tab.
In the From Email field, enter the email address that will be used to send emails. This could be a free email account, but we recommend an address with a custom domain for better deliverability. To ensure the entered address is used in all the emails, check Force From Email box.
In the From Name field, enter the name that will be displayed in sent emails. Once again, check Force From Name to ensure other plugins (for example, WooCommerce or WordPress newsletter plugin) don’t override this setting.
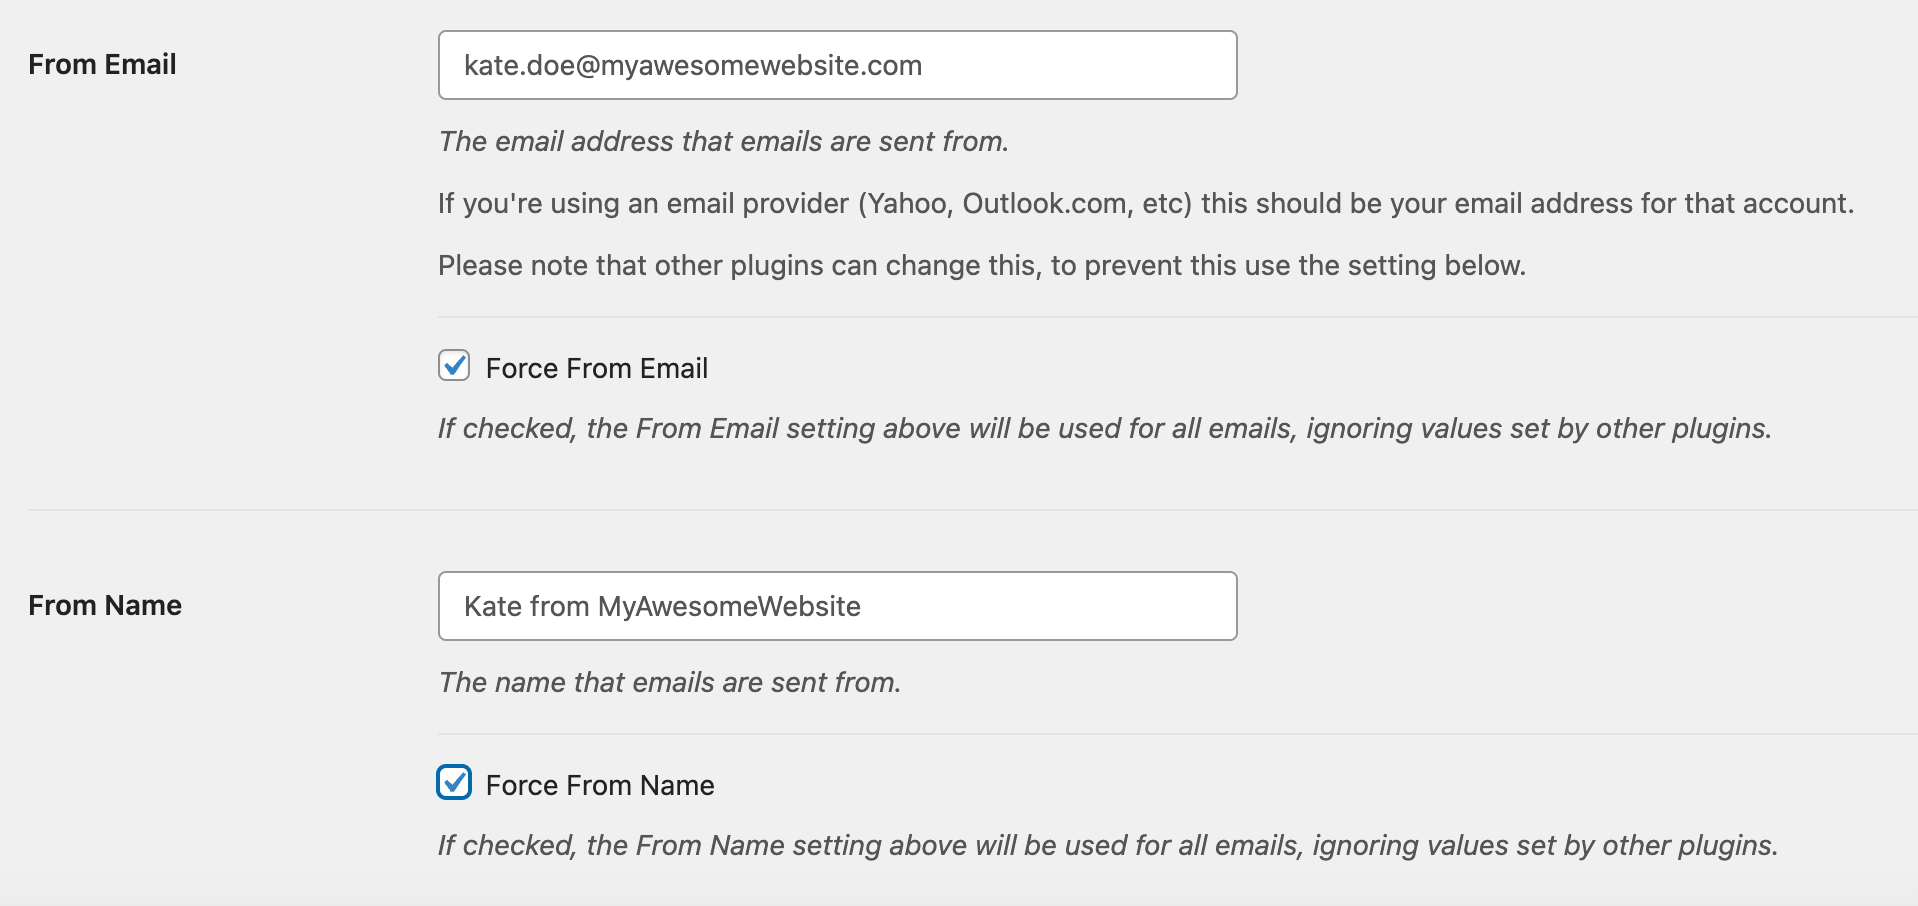
Once that’s done, we can move on to setting up the mailer to instruct WordPress to send emails with plugin.
Setting up WP mail with third-party SMTP services
Using a reliable third-party SMTP service is vital to ensure your WordPress emails are getting delivered to the recipients’ inboxes. With WP Mail SMTP’s Other SMTP feature, you can easily integrate your favorite mailer. For today’s tutorial, we’ll be using a reliable SMTP service provided by Mailtrap.
But before integrating it with your WordPress website, you first need to create an account and follow an in-app wizard to verify your domain. To get that done, you should have access to your domain’s DNS records. In those, you’ll have to add ready-made SPF, DKIM, and DMARC records, and then press Verify Domain.
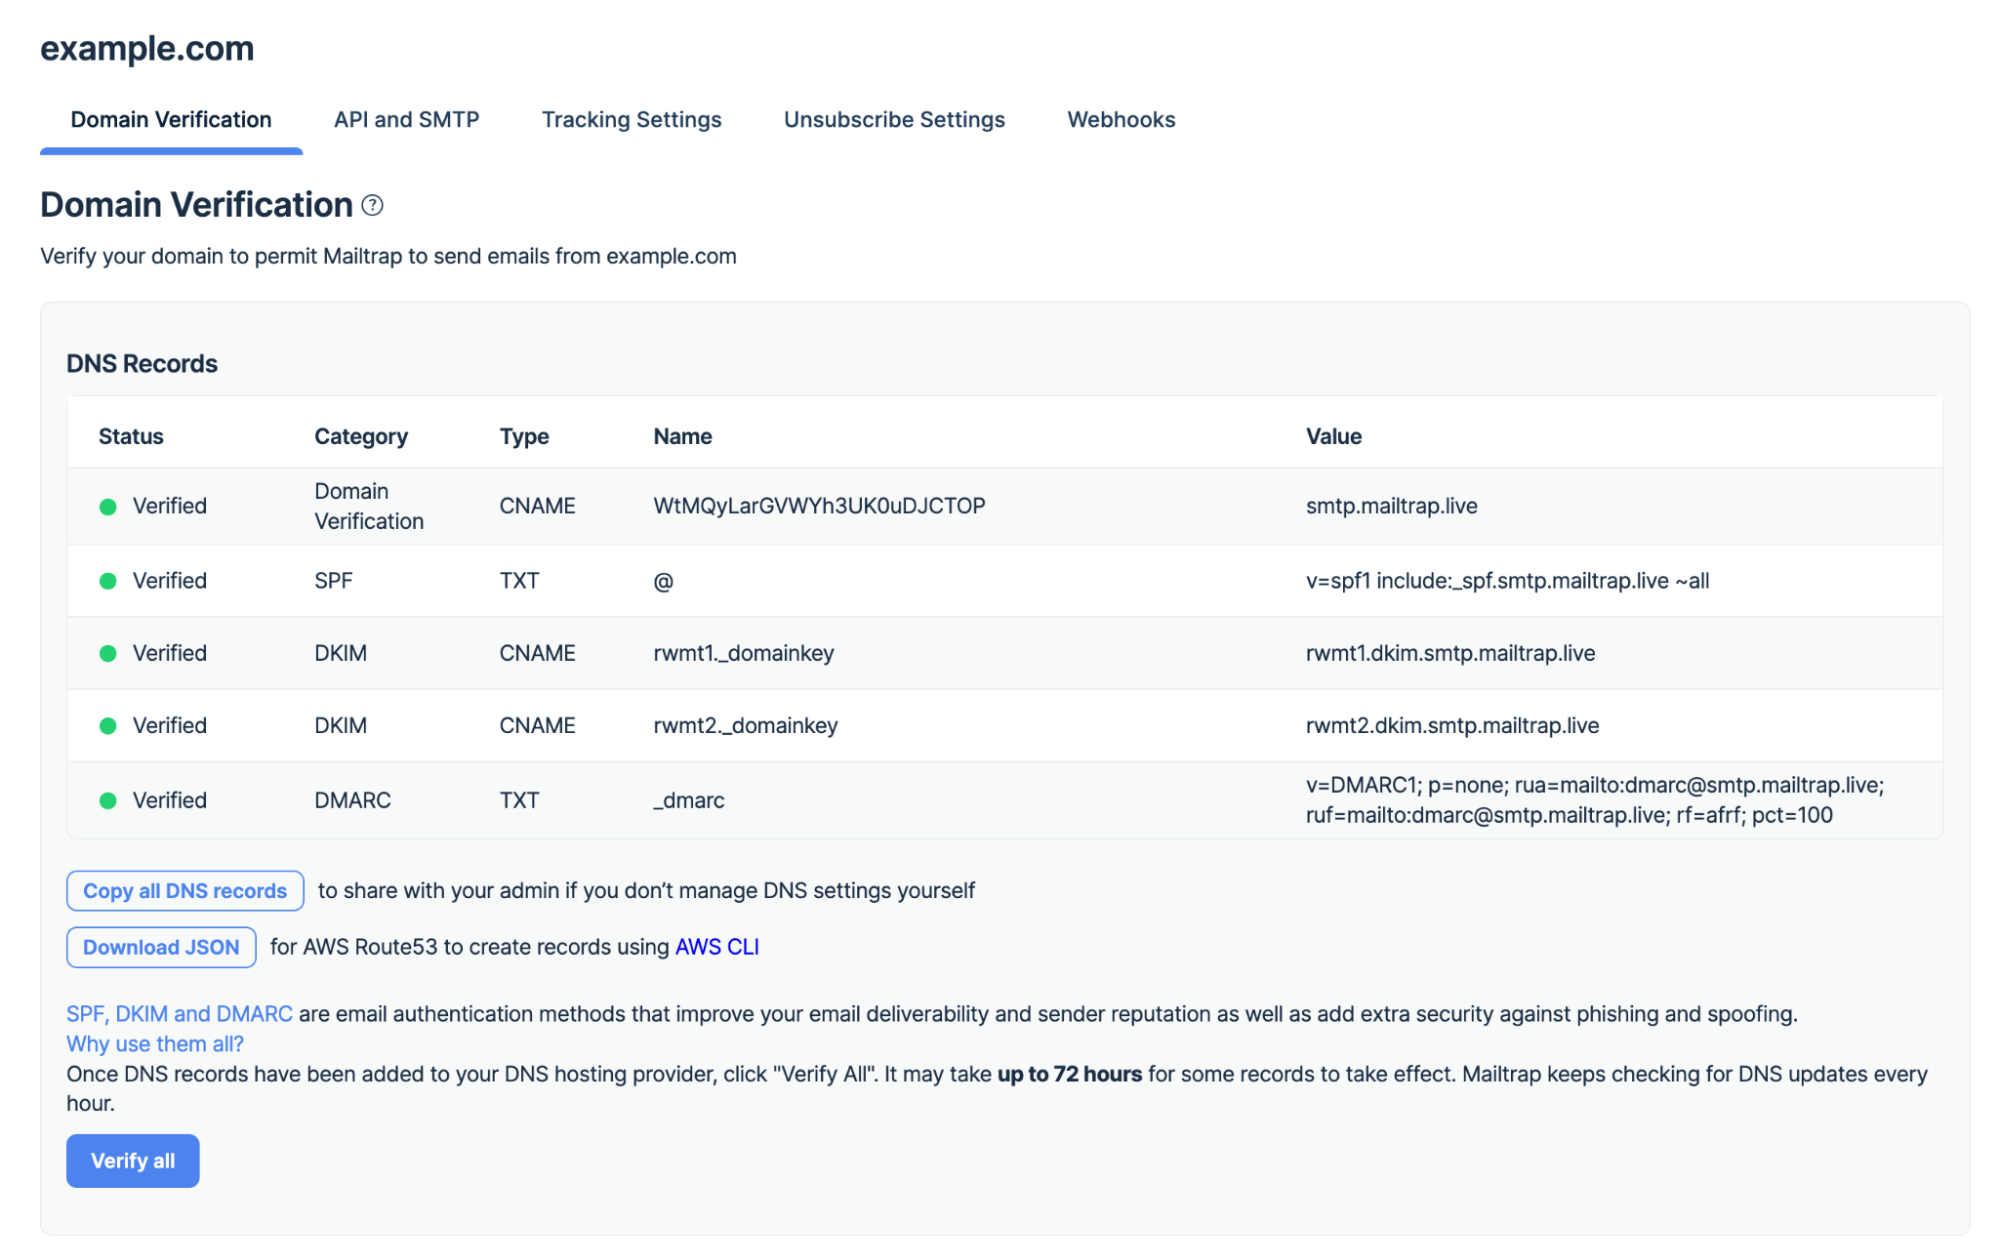
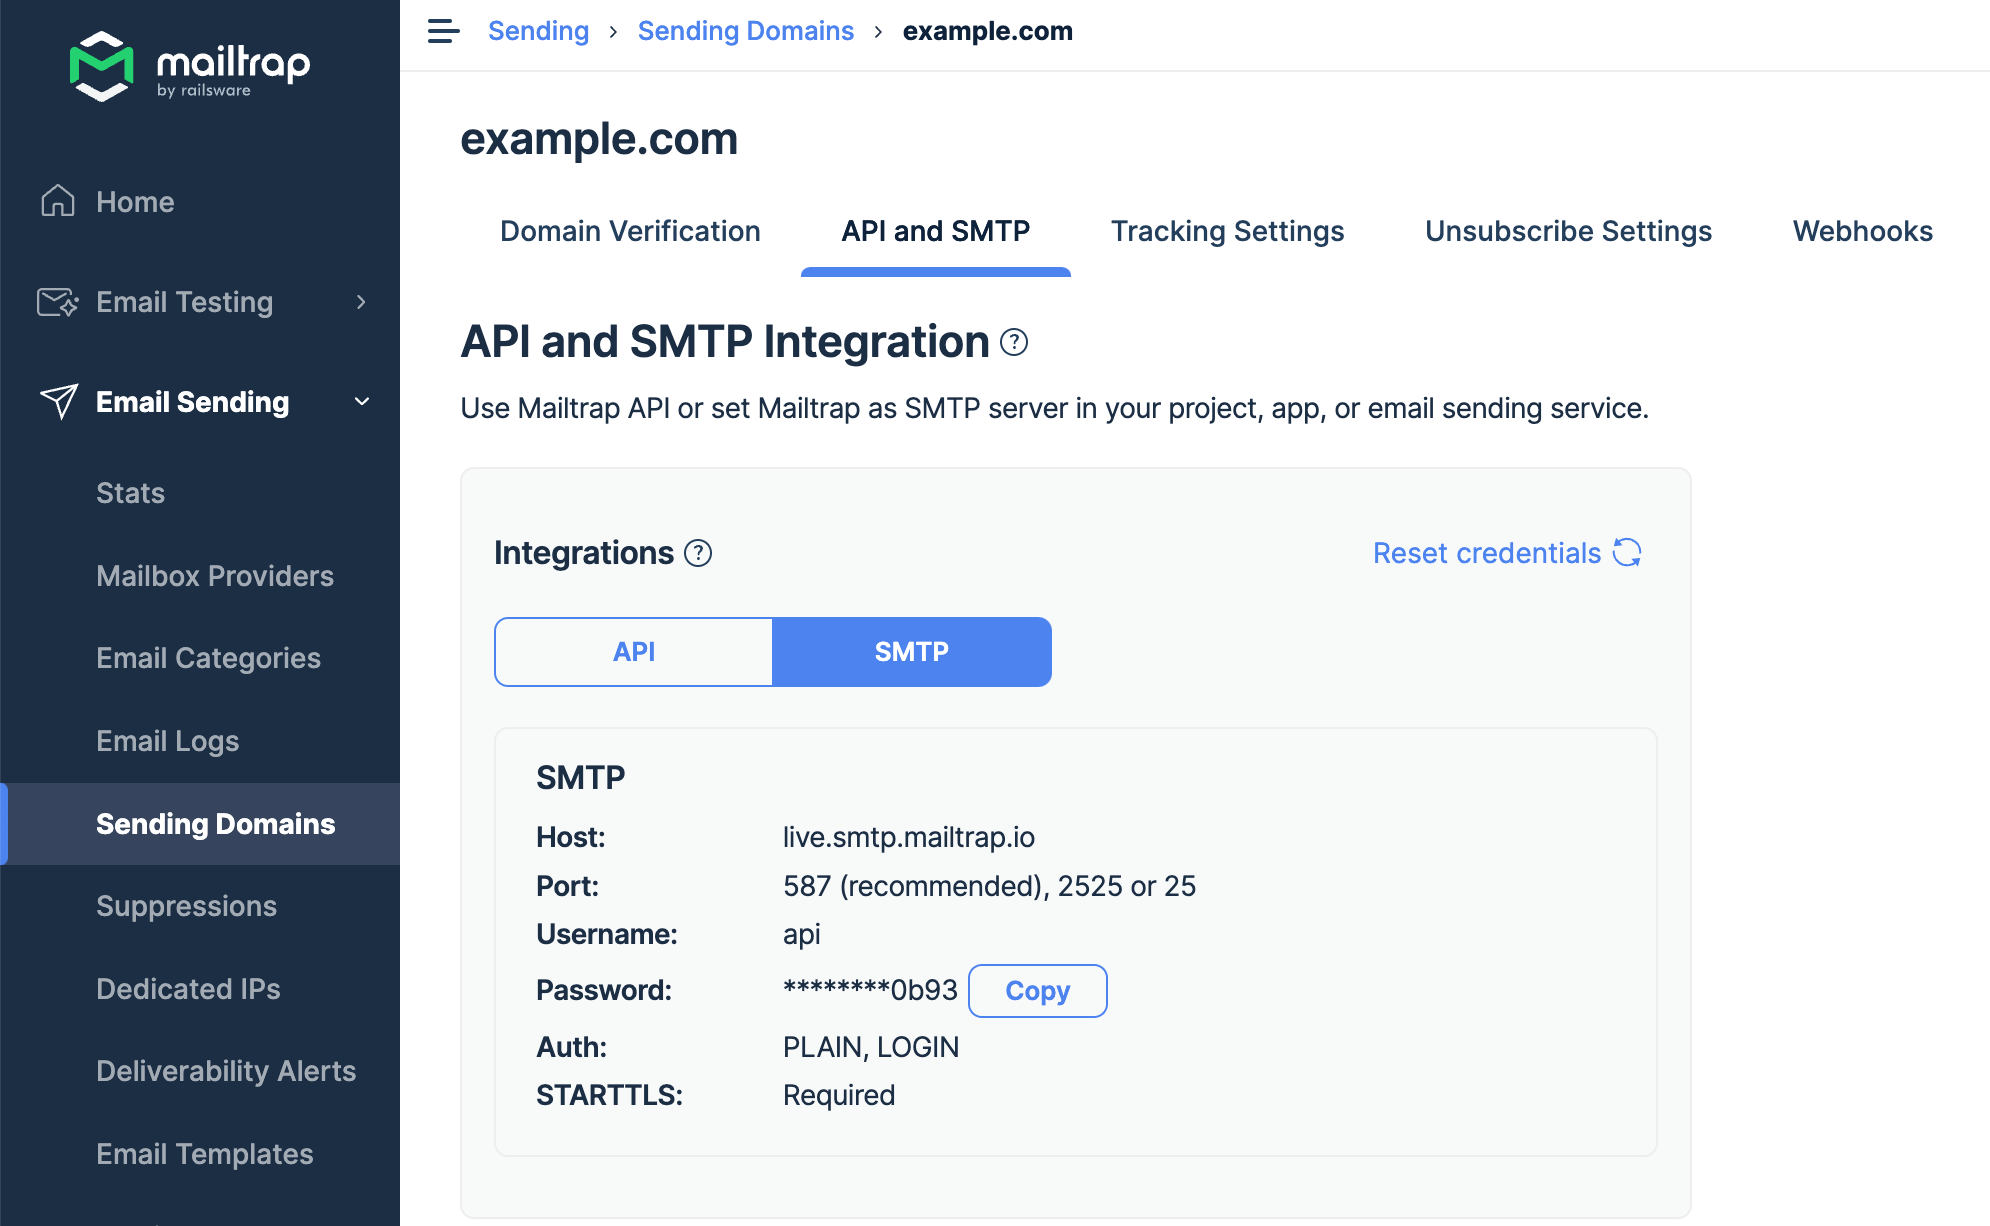
Once your account is up and running, go back to ‘Sending Domains‘ and press on the verified domain. Then click ‘API and SMTP’, choose ‘SMTP’, and copy the credentials.
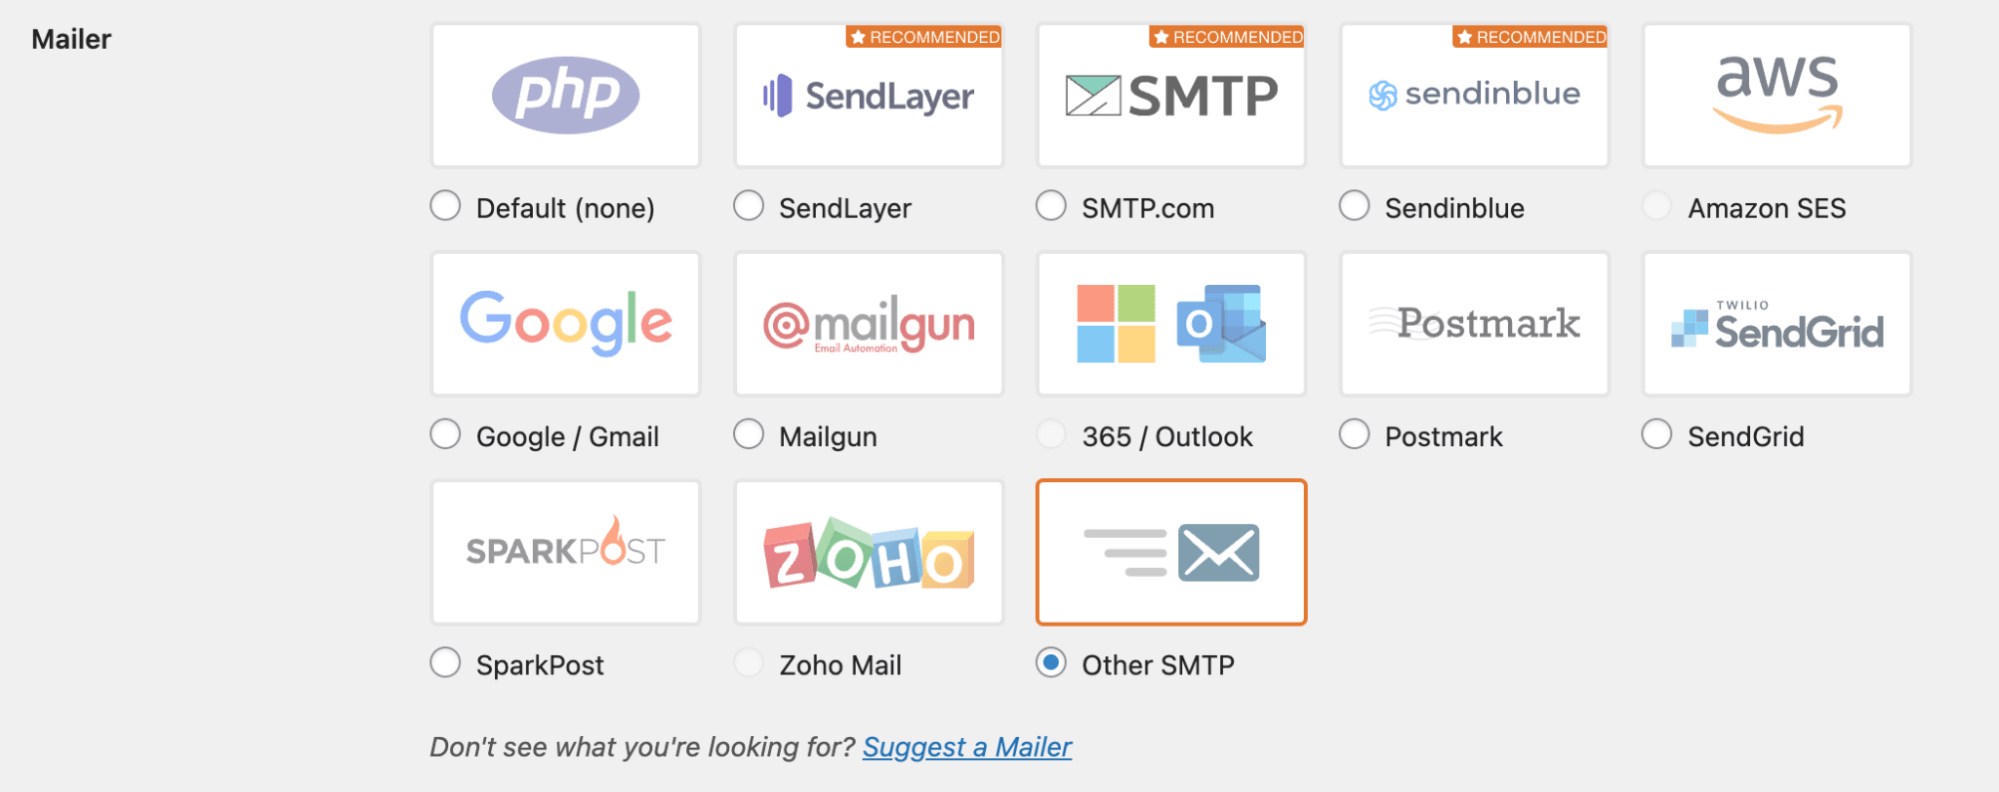
Go back to WP Mail SMTP and choose Other SMTP under the Mailer tab.
You’ll see a set of empty fields. Fill them out using Mailtrap’s SMTP credentials:
- SMTP Host: live.smtp.mailtrap.io
- Encryption: TLS (you could also choose SSL, but TLS is recommended)
- SMTP Port: 587 (will be filled out automatically)
- Authentication: toggle On
- SMTP Username: api
- SMTP Password: your SMTP password
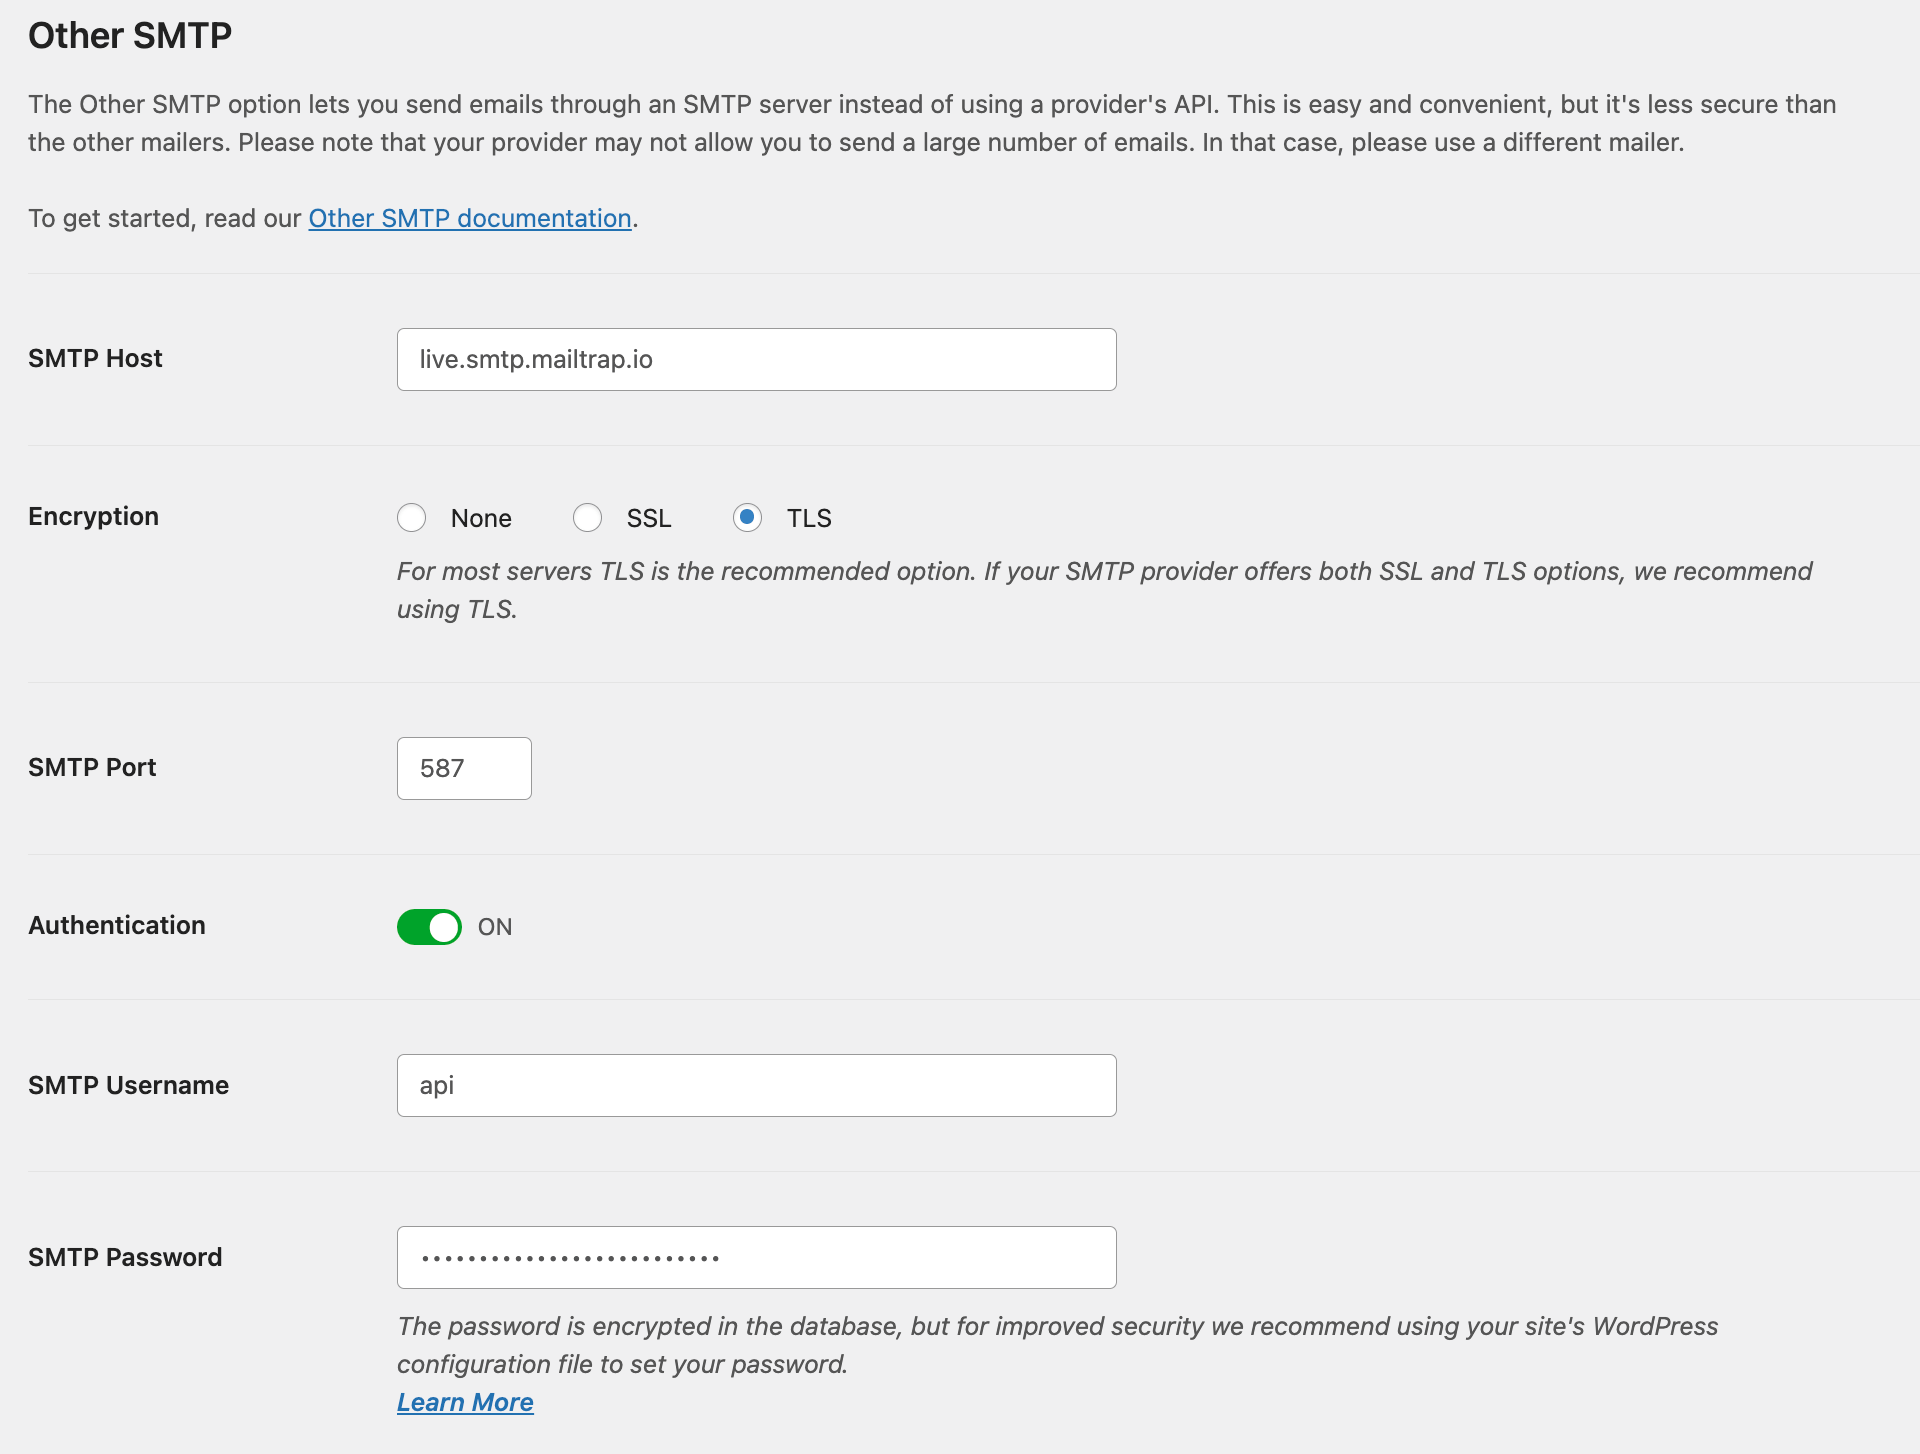
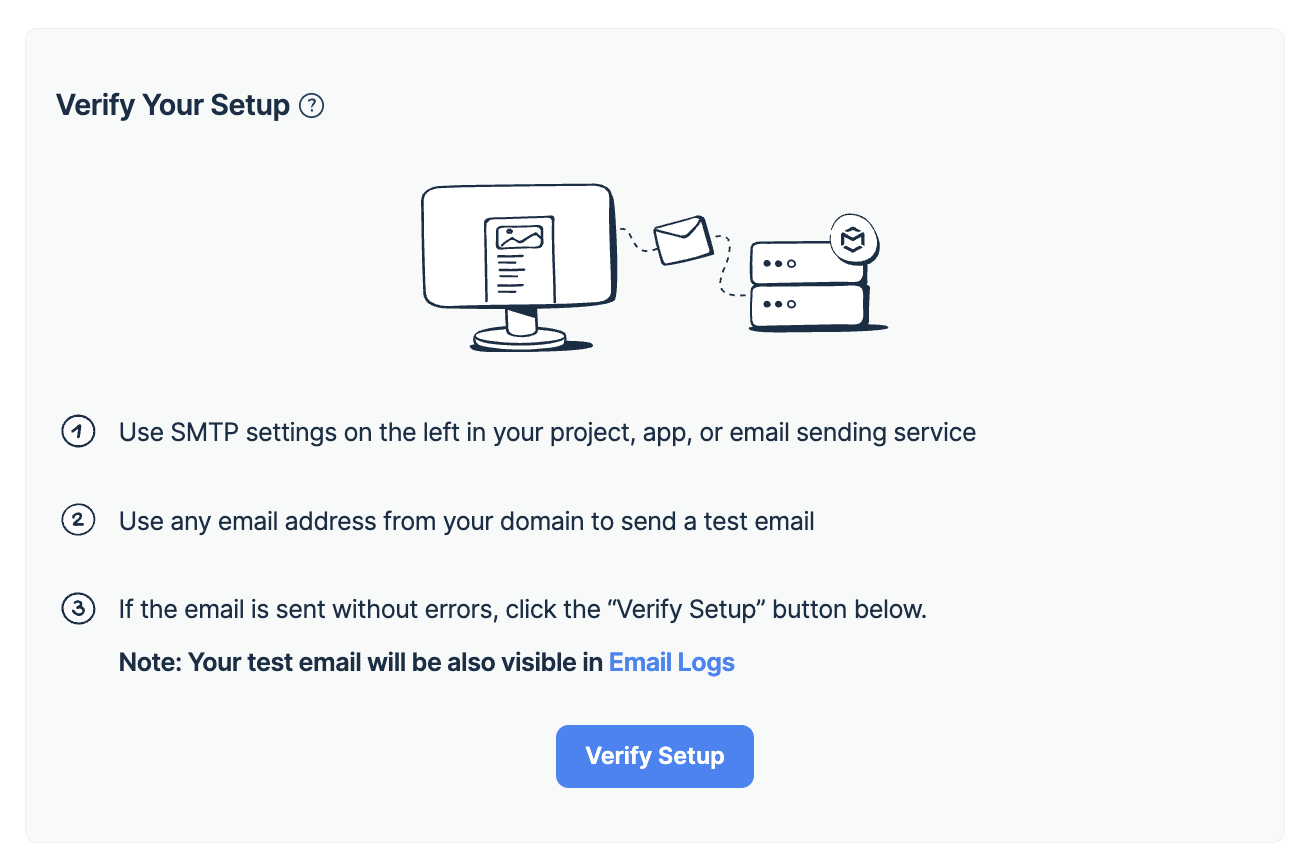
Press ‘Save Settings’. You’ll see a confirmation window. If everything is configured properly and WordPress sends SMTP email, go back to your Mailtrap account and press ‘Verify Setup’.
Using Built-in Mailer
Let’s move on to the second option of integration – using a built-in mailer to ensure WordPress uses SMTP to send emails. With this method, you can select one of the WP Mail SMTP’s mailers, including SendLayer, SMTP.com, Sendinblue, Amazon SES, etc. This method can also be used to set up Gmail SMTP in WordPress or even Microsoft 365/Outlook.
The process of integration is similar for most ESPs. Of course, you should have a working account to integrate it with WP Mail SMTP. You’ll just need to choose the mailer and enter your account’s API key. The instructions on that will be available in the ESP’s official documentation.
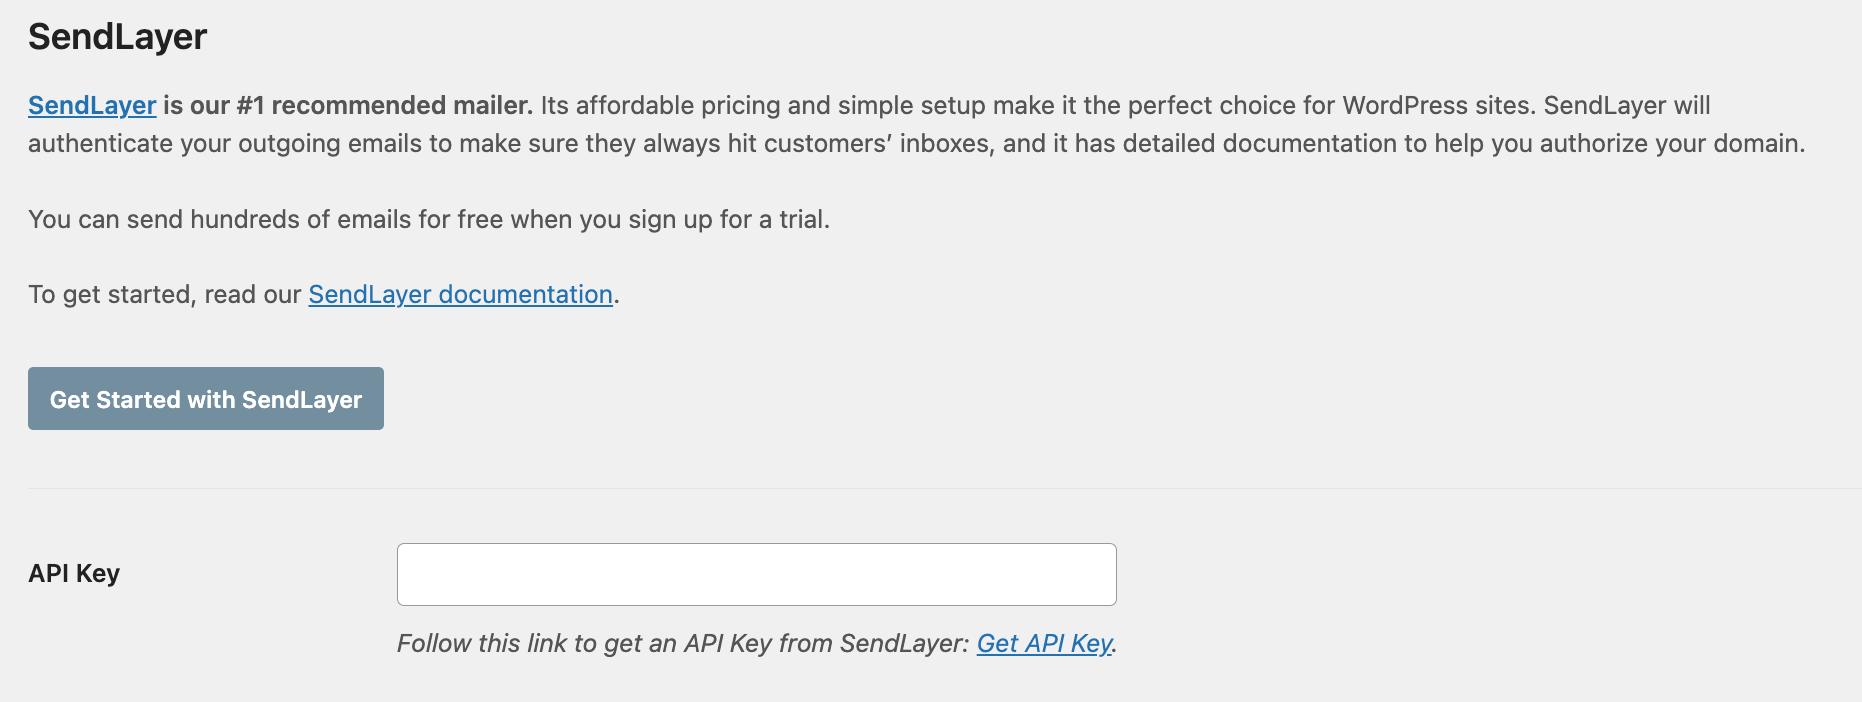
With some mailers, you may need to enter your sending domain, message stream ID, or region. Detailed instructions for each mailer are available here.
HubSpot WordPress Plugin

WP Mail SMTP is mainly used to configure WordPress to send emails with SMTP. On the contrary, HubSpot WordPress Plugin is a complete Customer Relationship Manager (CRM) plugin for your WordPress website. With its help, you can build email lists with sign-up forms, communicate with visitors with live chat, and analyze important metrics.
Most importantly, HubSpot WordPress Plugin enables you to integrate your preferred ESP to send marketing emails (manually or automatically) to your contacts. It also has built-in templates and a drag-and-drop editor. So, if you’re looking for something more than SMTP configuration, HubSpot may be a good choice for you.
Gmail SMTP

Gmail SMTP is another WordPress plugin to send emails with SMTP, but it’s specifically designed for Gmail. It relies on PHPMailer and the native wp_mail function to send emails, which means you can still use all of their functionalities.
Gmail SMTP plugin connects with Gmail using API and OAuth 2.0 protocol. That way, you won’t have to enter any usernames or passwords. However, you will need to create an app in Google Developer Console and configure OAuth credentials. Luckily, the plugin’s official page lists the necessary instructions.
Post SMTP Mailer

The last option we have here is Post SMTP Mailer. It’s a user-friendly plugin that lets you integrate ESP using SMTP or API. The free version supports Mailgun, SendGrid, Mandrill (now Mailchimp Transactional Email), SparkPost, Postmark, Sendinblue, and Gmail APIs. The Pro version will give you access to Zoho Mail, Amazon SES, and Microsoft 365.
Additionally, Post SMTP Mailer stores email logs and sends Chrome notifications if any issues occur.
How to test emails in WordPress?
To ensure your configuration can send emails from WordPress successfully, you’ll need to test your emails. Most plugins come with the default testing feature for some basic inspection.
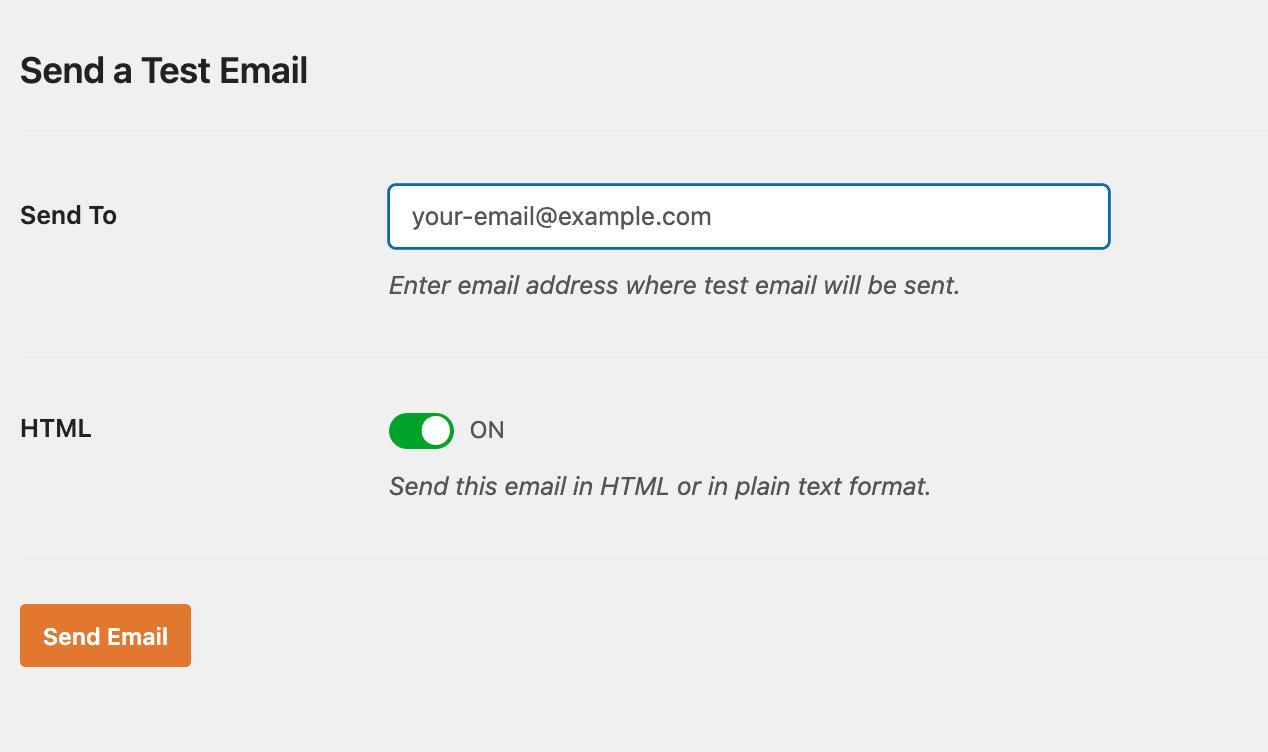
With WP Mail SMTP, for example, you can navigate to the ‘Email Test’ tab, enter your email address, and press ‘Send Email’. If the configuration is correct, you should find a test email in your inbox. If not, WP Mail SMTP will show you an error log.
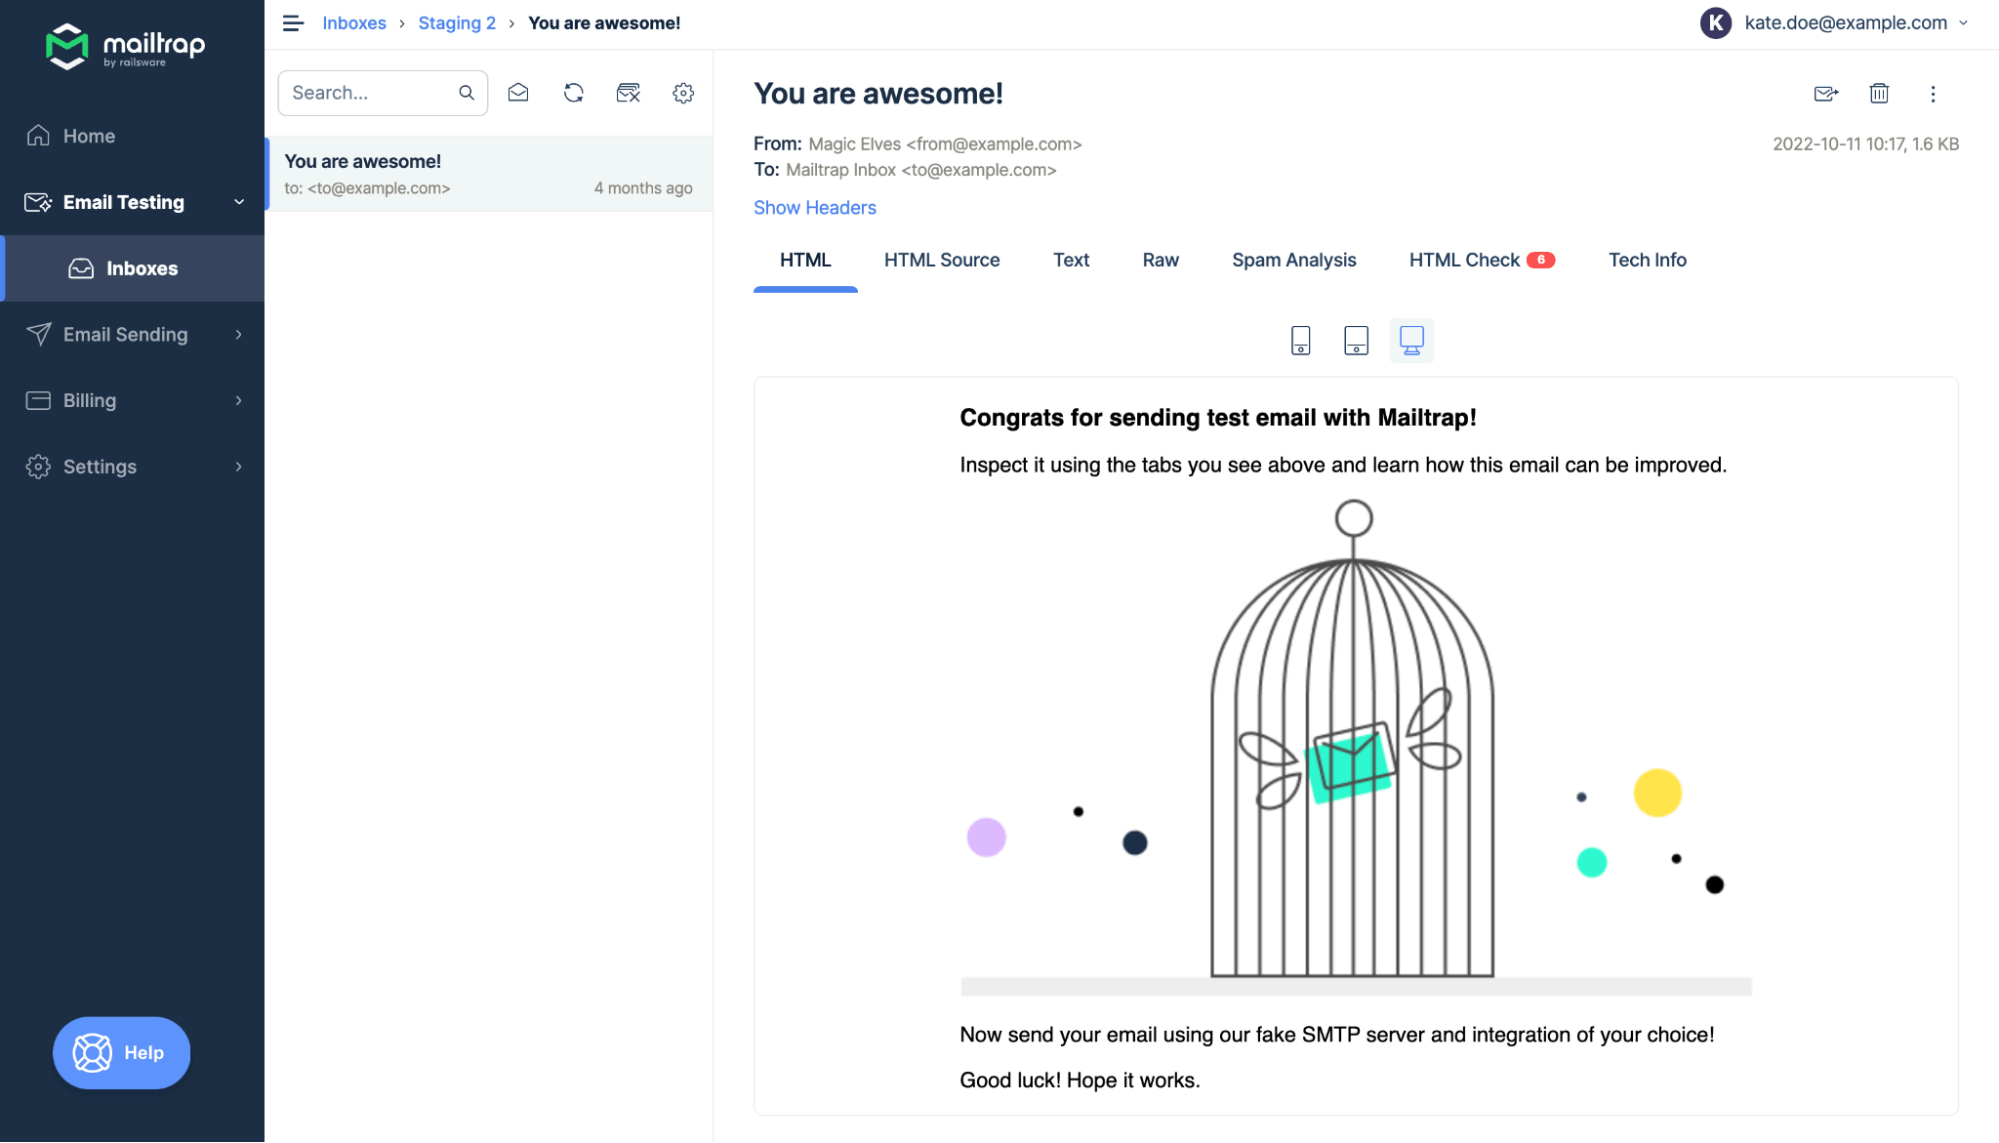
However, testing the email-sending functionality isn’t always enough. It’s essential to test HTML, validate headers, and check your spam score before sending emails to your contacts. That’s where Mailtrap’s another solution, Email Testing can help you. It will capture your WordPress emails into a virtual inbox, making sure that none of them reach recipients’ inboxes.
Similar to Email Sending, Email Testing can be integrated with WordPress plugins using its SMTP credentials. You’ll find those in your account by expanding ‘My Inbox’ and pressing ‘Show Credentials’. Here’s what sample SMTP settings will look like:
- SMTP Host: sandbox.smtp.mailtrap.io
- Encryption: TLS or SSL
- SMTP Port: 465 or 587
- Authentication: toggle On
- SMTP Username: <your SMTP username>
- SMTP Password: <your SMTP password>
In a matter of seconds, your test email will pop up in your virtual inbox if the configuration is correct.
As we’ve seen, to configure WordPress to send emails with SMTP, you have two main options: coding with PHPMailer or using plugins. The first option is more suitable for developers, while the second option is perfect for marketers. Whichever method you choose, the main thing is to find a way around PHP’s shortcomings.
All the plugins we listed above allow you to use Gmail’s SMTP. While it’s good enough for sending occasional emails, it’s better to opt for a reliable ESP to send high volumes of emails. Otherwise, your emails will most likely be marked as spam.
Enjoy!


