
Easy WordPress Speed Optimization – 10 Simple Tips
Optimizing the speed of a WordPress website is essential for ensuring a superior user experience and achieving higher rankings in search engine results. Slow websites not only deter visitors but…

Menus are an essential element of any website, enabling smooth navigation and easy access to various sections. If you’re using WordPress, creating a menu is a simple and intuitive process. In this blog post, we’ll walk you through the steps to create a menu in your WordPress website.
Table of Contents
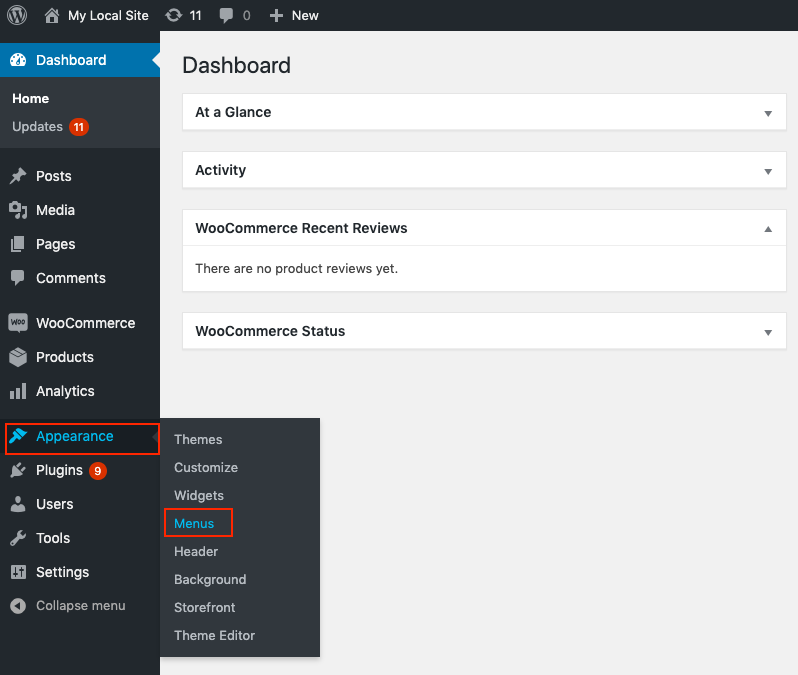
From your WordPress dashboard, select Appearance > Menu.

You will then arrive at the edit menu box where you can begin building a new menu.

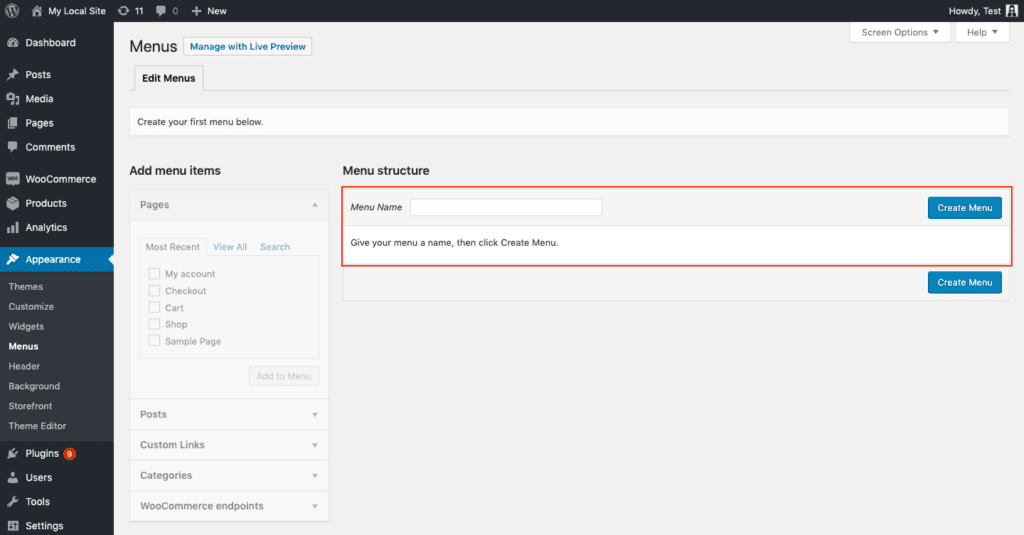
The new menu may be created by typing a name into the box provided and clicking the Create menu button.
A brand-new menu called “Menu1” will be made by me.

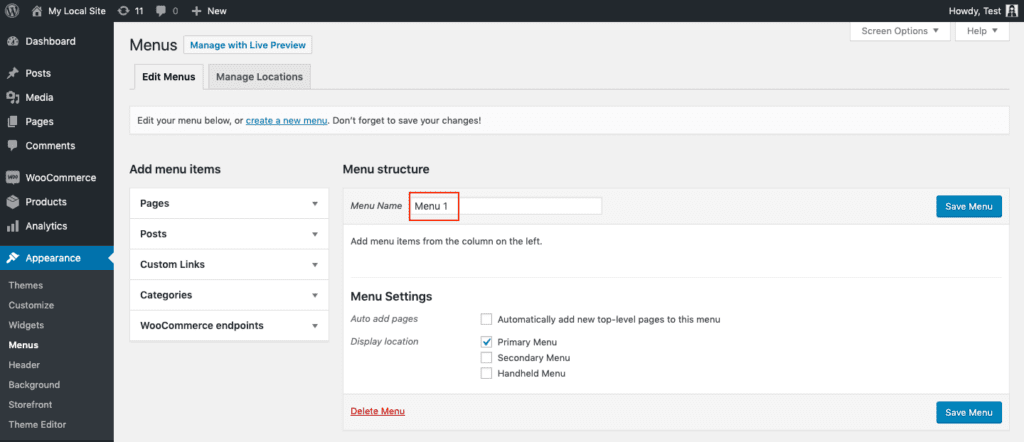
The Primary menu is chosen as the display position in the Menu settings. It should be remembered that your theme will affect where your display is placed. Therefore, the display placement may vary depending on the theme. You must check your webpage to confirm this.
You can now save the newly generated menu by clicking the Save Menu button.
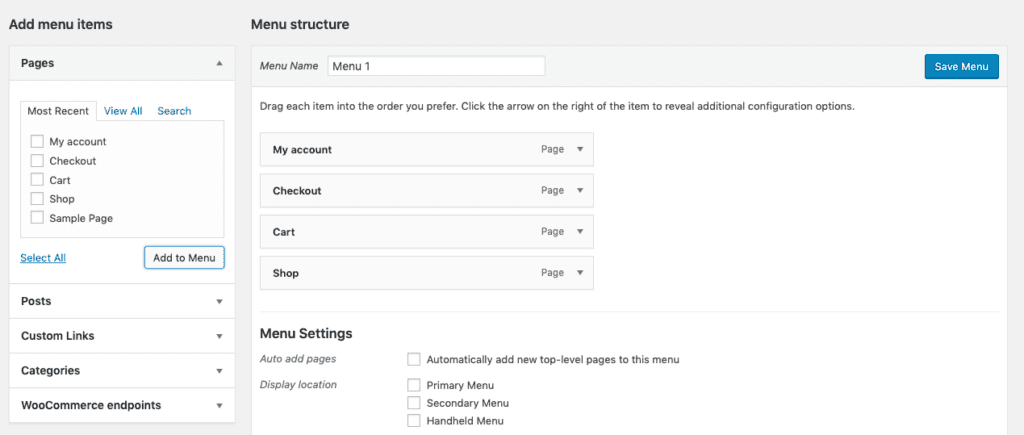
Once a new menu has been created, you may continue to add items to it like pages, categories, articles, custom links, and WooCommerce endpoints.
You will learn how to add pages, categories, and subcategories to the menu in this section.
You may choose the pages you want to add to the menu by clicking the Add to menu button on the edit menu page’s left side. The menu will now include the specified pages.

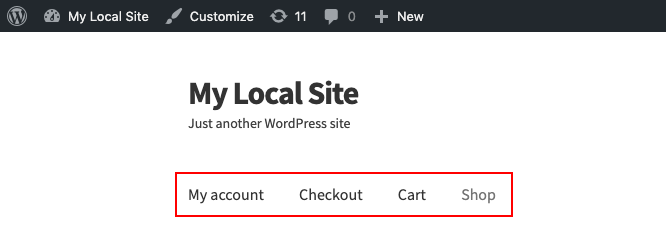
Here is a screenshot of the website’s main menu as it appears on the front end.
This is how the recently developed appears on the website.

Categories
Let’s begin adding categories to the menus right now.
From the drop-down menu on the left, select the categories you want, then click the Add to menu button. From the list of categories, I decided to add category 1 to the menu.


I’m going to rearrange the category such that each page belongs to it right now.

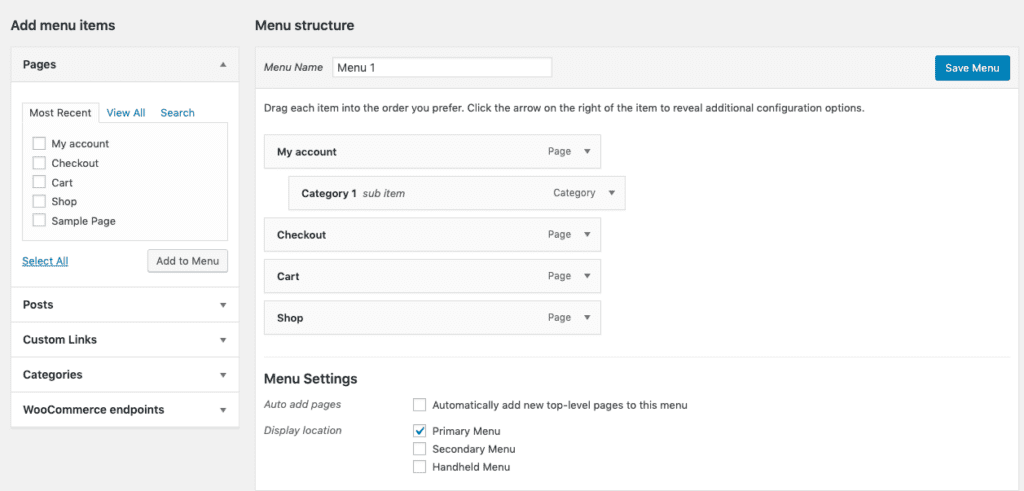
then select Save Menu to save the adjustments.
It changes a website as seen below.

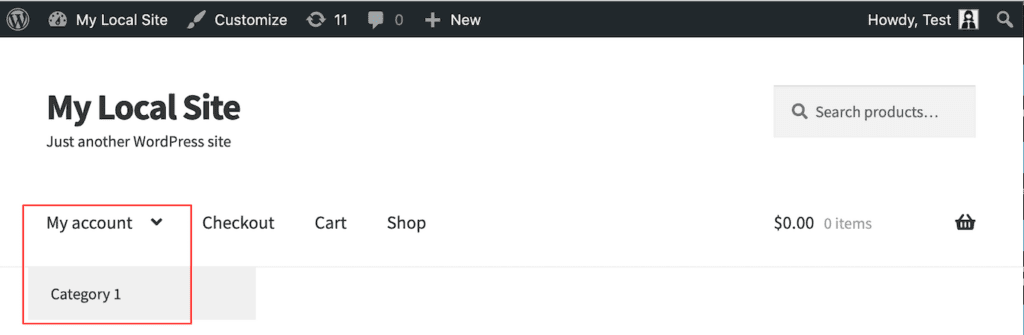
Now there is a category on the My Account page.
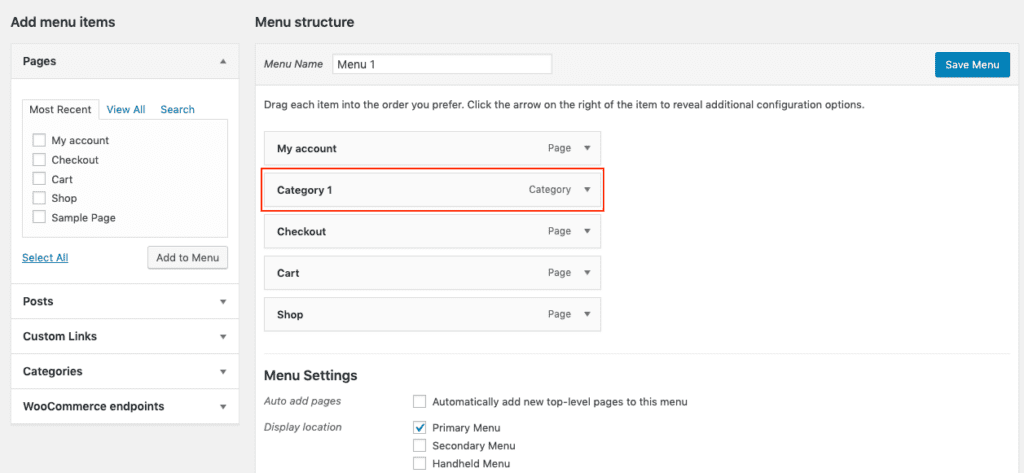
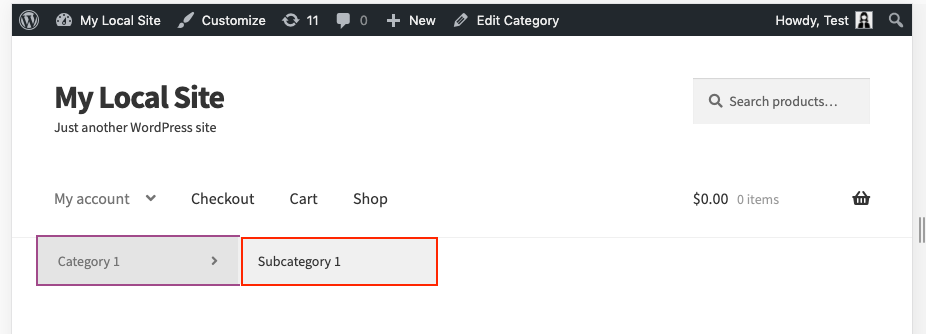
Subcategories Now let’s add a subcategory to the category mentioned above. You may select the subcategory and then click the Add to Menu button in the same way that we added the category.
As seen in the screenshot below, place the subcategory underneath category one.

Now select Save from the menu.
Here is how the website appears after adding a menu subcategory.

Widgets may be used to add menus to your sidebar.
You must go to Appearance > Widgets to accomplish this. The resultant window is seen in the screenshot that follows.

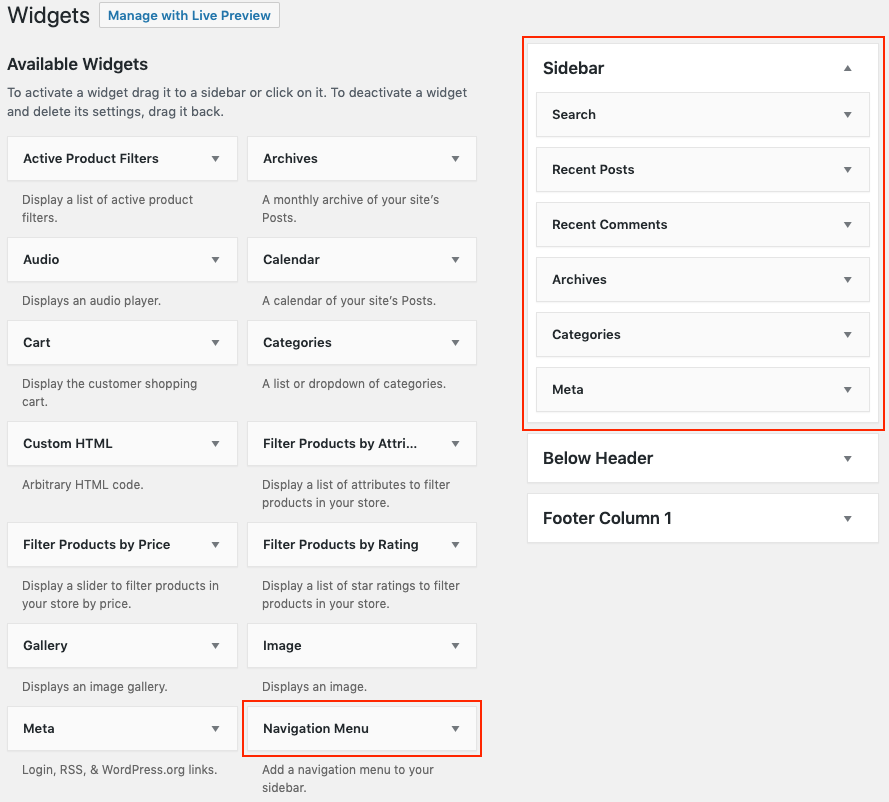
You must first drag and drop the Navigation menu widget to the desired location before you can add a menu to the sidebar.
In this instance, I’ve positioned it underneath Search.

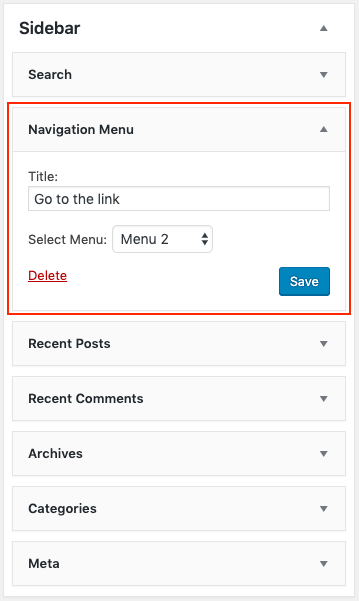
You may give it a title (in the example, “Go to the link”), choose the menu (menu 2) from the dropdown menu, and then click the Save button to add it to the sidebar.
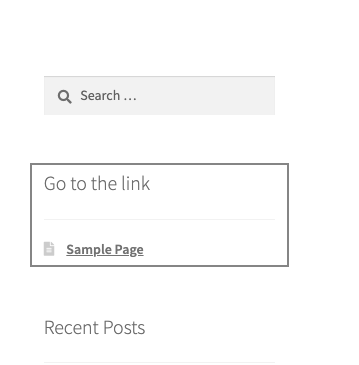
A screenshot of the website’s redesigned sidebar menu is shown below.

Conclusion
One of the easiest and most fundamental skills that WordPress students should have is creating menus. You’ll have complete control over your website after you’ve mastered it. I really hope the previous instruction was useful to you in understanding the procedure.
Creating a menu in your WordPress website is a straightforward process. A well-designed menu improves your website’s navigation and enhances the user experience. Here’s a detailed guide on how to create a menu in WordPress:
You can add various items such as pages, posts, custom links, and categories to your menu.
The added items will appear under the Menu Structure section.
You can further customise your menu using CSS or by editing the theme files if you’re comfortable with coding:
By following these steps, you can create an effective and user-friendly menu for your WordPress site, ensuring smooth navigation for your visitors.


Subscribe to our newsletter below and never miss the latest product or exclusive offers.
