cPanel is great for managing websites, apps, and email accounts hosted on servers in data centers, but many people also want to host online services at their home or business. Unfortunately, many residential and business ISPs don’t offer dedicated IP addresses, which means that you can’t use a domain name to connect to services hosted on their networks.
The solution is dynamic DNS, which automatically updates domain records when IP addresses change. It is incredibly easy to set up dynamic domains in cPanel with our new Dynamic DNS tool. In this article, we’ll explain how dynamic DNS works and show you how to configure a domain in minutes.
Table of Contents
What is Dynamic DNS?
Dynamic DNS is a system for updating DNS (Domain Name System) records. When you type a URL into a web browser, it asks a DNS server to convert the domain name into an IP address, the unique number that identifies devices on the internet. The server looks at DNS records stored in zone files to find the IP address associated with a domain.
If the IP address changes, as it does on most domestic and business networks, the records quickly become outdated. The server sends the wrong address, and the connection fails.
Dynamic DNS provides a way for devices like network routers to tell servers when their IP address changes. The device connects to a special web address, authenticates, and sends the new IP. cPanel updates the zone records, and the next time someone tries to connect, they get the right IP.
Creating DDNS Domains with cPanel
cPanel has supported dynamic DNS domains for many years. In the past, we recommended the cPanel Dynamic DNS Tools script, which runs on a server on your network and can automatically update zone records.
The script remains a useful option for users with older versions of cPanel, but the Dynamic DNS interface introduced in cPanel version 94 simplifies the process, integrating with routers and firewalls without requiring a third-party script.
Managing dynamic domains is a two-step process:
- Create the domain in cPanel’s Dynamic DNS interface.
- Configure your network’s router or firewall with the information cPanel provides.
Create a New DDNS Domain in cPanel
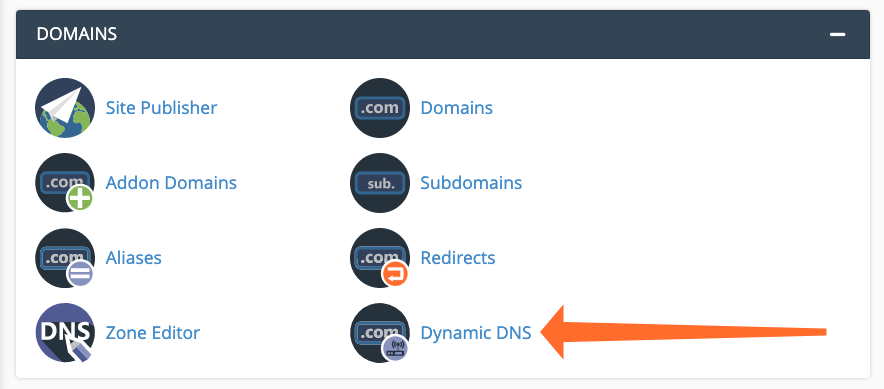
First, we’ll set up the domain. Log in to your cPanel account and navigate to Dynamic DNS, which you will find in the main page’s DNS section.
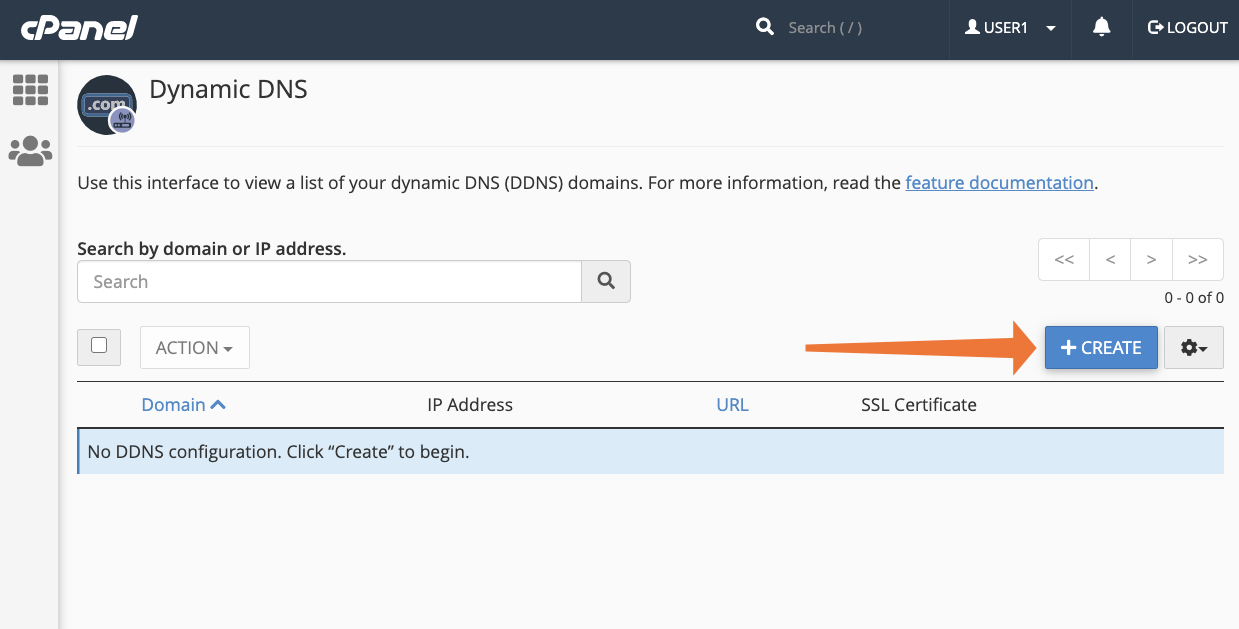
Click the Create button.
Enter a new subdomain for a domain managed by your cPanel account. For example, if you want to host a file server on a business or home network, you might choose “files” as the subdomain.
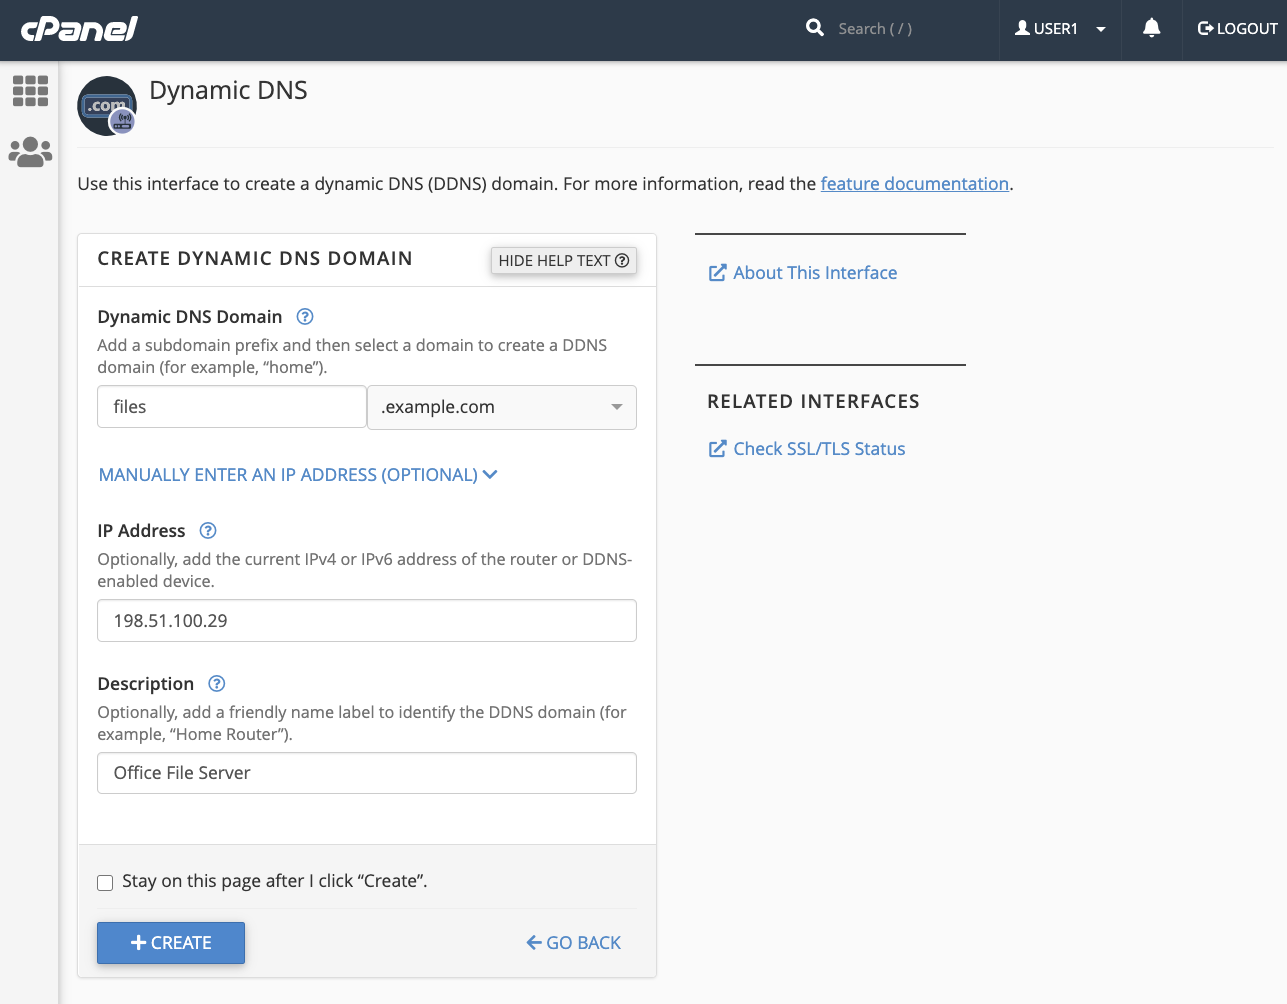
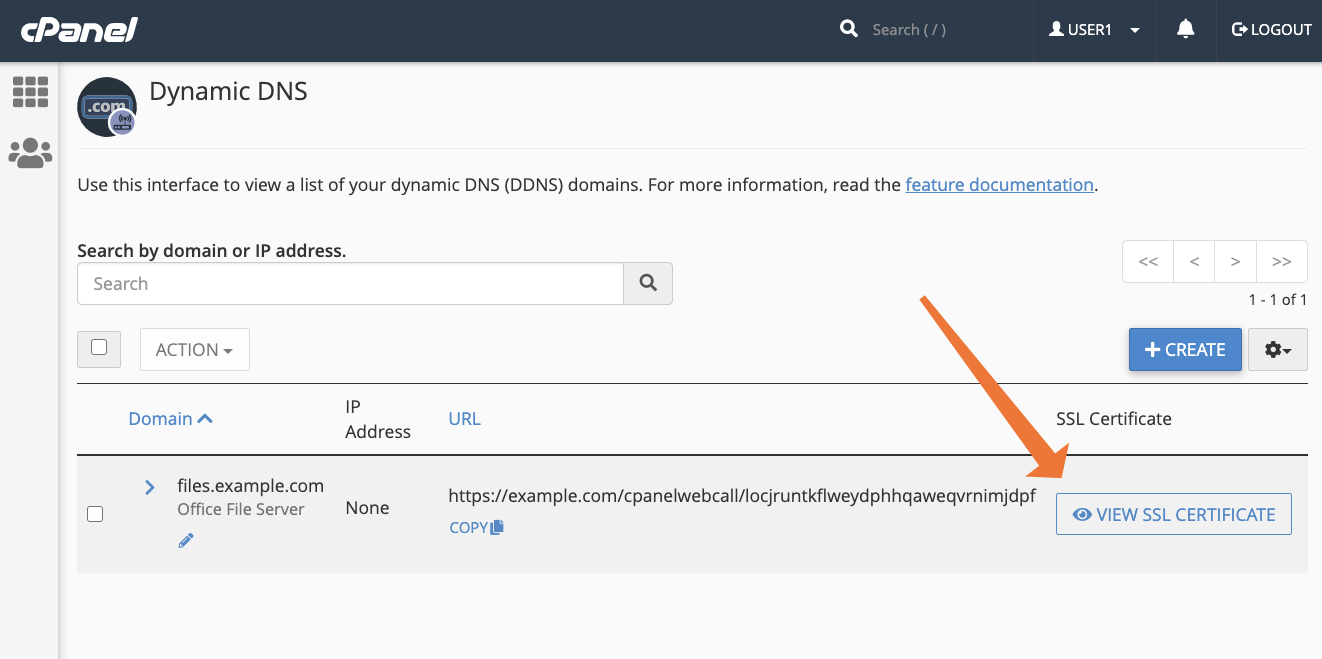
You can also provide the current IP address of the network or device your domain will point to, although it will be automatically updated once dynamic DNS is up and running. Finally, you can give the domain a name to help you remember what you are using it for; “Office File Server,” for example. When you click Create on this page, cPanel creates the subdomain and generates a unique URL called a webcall.
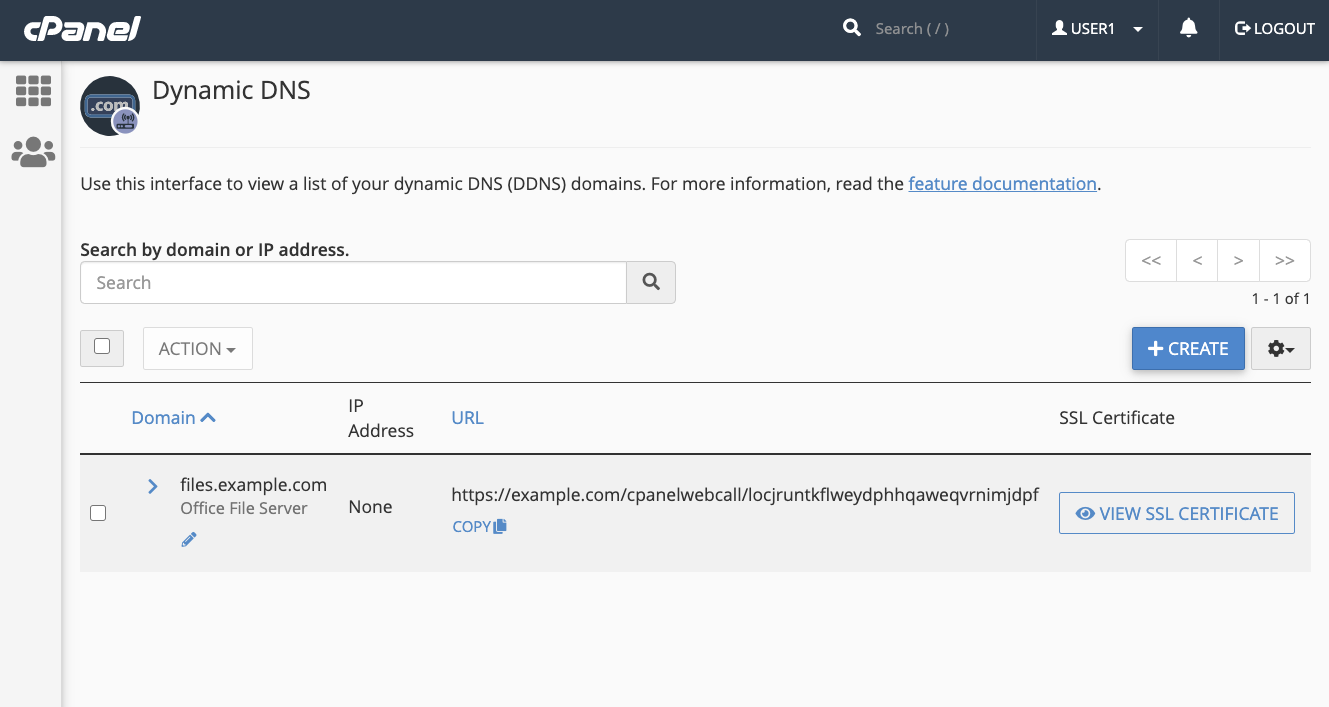
The webcall is the address that a router or server will use to tell cPanel that its IP address has changed. When cPanel receives a valid message at this URL, it updates the domain’s zone records.
Configure Your Router for Dynamic DNS
Every router, firewall, and DDNS client has a unique process for configuring custom DDNS domains, so we can’t give precise instructions.
In most cases, you will need to:
- Identify your device’s DDNS configuration interface.
- Select Custom DDNS provider or similar.
You may also be asked to provide an SSL certificate so the device can connect over an encrypted connection. You can view and copy the SSL certificate for your domain by clicking the View SSL Certificate button. We strongly recommend using SSL to prevent your username and password from being sent unencrypted.
If you’re having trouble, consult the documentation for your device and its software. Documentation for some of the most popular open-source router and firewall software includes:
Once your device is configured, it will use the webcall URL to contact cPanel when its dynamic IP address updates, ensuring that the service hosted on your network can always be reached at your chosen domain name.
As always, if you have any feedback or comments, please let us know. We are here to help in the best ways we can. You’ll find us on Discord, the cPanel forums, and Reddit.


